Contrary to popular belief, you don’t need an expensive camera for professional-looking holiday photos; you need to master the professional techniques your smartphone camera already enables.
- The difference between an amateur snapshot and a professional photo is intentionality—managing light, composing thoughtfully, and editing with subtlety.
- Advanced phone features like HDR, composition grids, and optical zoom are the keys to overcoming common challenges like poor lighting and crowded locations.
Recommendation: Instead of taking hundreds of random snapshots, focus on creating a few, well-composed shots by applying the principles of light, composition, and storytelling outlined in this guide.
You return from a breathtaking trip, scroll through your phone, and a familiar wave of disappointment washes over you. The vibrant sunset looks flat, the majestic landmark is lost in a sea of tourists, and the photos just don’t capture the magic you felt. You see influencers posting stunning travel images and assume the secret is a £3,000 camera. This is the great myth of modern photography. With smartphones now accounting for a staggering 92.5% of all photos captured worldwide, the gear is no longer the barrier. The real gap between your photos and theirs isn’t the camera; it’s the technique.
Most advice stays on the surface: « clean your lens » or « find good light. » While true, this advice fails to explain the fundamental principles that professional photographers use. It doesn’t teach you how to manage a scene with extreme light and shadow, how to guide a viewer’s eye through a composition, or how to tell a story with a single frame. This guide is different. We will move beyond the platitudes and demystify the process.
The key to unlocking your phone’s potential is not in its settings menu, but in your approach. It’s about shifting your mindset from passively « snapping » what’s in front of you to intentionally « creating » an image. We’ll explore the science of light, the grammar of composition, and the art of subtle editing. By understanding *why* certain photos work, you will learn to make deliberate choices that transform your holiday snapshots into professional-quality photographs, using only the powerful device already in your pocket.
This article will guide you through the essential techniques and mindset shifts required to elevate your mobile photography. From mastering exposure and composition to editing like a pro and navigating crowded tourist spots, you’ll find a structured path to capturing the stunning holiday photos you’ve always wanted.
Contents: A Guide to Professional Mobile Holiday Photography
- Why Do 80% of Holiday Photos Look Washed Out or Too Dark?
- How to Use the Rule of Thirds to Improve Your Holiday Photos Instantly?
- 500 Snapshots or 50 Composed Shots: Which Approach Yields Better Holiday Photos?
- The Filter Overuse That Ruins Otherwise Beautiful Holiday Photos
- When Should You Photograph Popular Landmarks to Avoid 100 People in Your Holiday Photos?
- Golden Hour Crowds or Midday Solitude: When Should You Photograph Extraordinary Landscapes?
- Why Do Iconic Destinations Look Empty in Photos But Packed When You Visit?
- How to Enjoy Iconic Destinations When Reality Doesn’t Match Instagram Perfection?
Why Do 80% of Holiday Photos Look Washed Out or Too Dark?
The single biggest challenge in photography is light, or more specifically, the range of light in a scene. Your eyes are magnificent tools, able to see detail in both the bright sky and the dark shadows of a building simultaneously. A camera sensor, even on the latest smartphone, cannot. This limitation is called dynamic range. When a scene has both very bright and very dark areas—like a person standing against a bright sunset—your phone has to choose. It either exposes for the bright sky, plunging your subject into a dark silhouette, or it exposes for the subject, blowing out the sky into a washed-out white patch. This is why so many holiday photos fail.
The solution built into your phone is High-Dynamic Range (HDR) mode. When enabled, your phone doesn’t take one photo; it rapidly takes several at different exposure levels (one dark, one medium, one bright) and automatically merges them. This process combines the best-lit parts of each shot—the detailed sky from the dark photo and the visible subject from the bright photo—into a single, balanced image. It’s the most effective tool for taming high-contrast scenes, which are incredibly common in travel photography.
To use it effectively, first, ensure HDR is set to « Auto » or « On » in your camera settings. When you frame your shot, tap on your main subject to set the focus and initial exposure. Then, hold the phone as steady as possible while you take the picture. The camera needs a moment to process the multiple exposures, so any movement can result in a blurry image. HDR is your best friend for landscapes with bright skies, subjects backlit by the sun, or architectural shots with deep shadows. However, it’s less effective for moving subjects, as they can appear ghosted in the final merged image.
How to Use the Rule of Thirds to Improve Your Holiday Photos Instantly?
The most common mistake in amateur photography is placing the subject directly in the center of the frame. While it feels intuitive, it often results in static, uninteresting images. The fastest way to add dynamism and a professional feel to your photos is by using one of photography’s oldest and most effective compositional guides: the rule of thirds.
Imagine your screen is divided into a 3×3 grid by two horizontal and two vertical lines, creating nine equal boxes. Most phone cameras have a setting to display this grid. The rule of thirds suggests that you should place the most important elements of your scene along these lines or, for maximum impact, at the points where they intersect. For a landscape, this could mean placing the horizon on the top or bottom horizontal line, rather than in the middle. For a portrait, it means positioning the person’s eyes on or near one of the upper intersection points.
This paragraph introduces the concept of the composition grid. To understand it better, it’s helpful to see what it looks like in practice. The illustration below shows how this grid overlays on your phone’s screen, guiding your composition.
As you can see, this simple overlay transforms how you see the scene. Instead of just pointing and shooting, you begin to think about balance and visual weight. Placing a subject off-center creates a sense of movement and space, making the image more engaging for the viewer. This isn’t just an arbitrary rule; it’s based on how our brains naturally process visual information. As the team at Digital Photography School notes, this technique has a proven psychological effect:
Studies show that people’s eyes usually go to one of the intersection points rather than the center of the shot.
– Digital Photography School Editorial Team, Rule of Thirds in Photography: The Essential Guide
By composing with the rule of thirds, you are actively guiding the viewer’s eye, creating a more compelling and professionally structured photograph. It’s the first step in moving from taking snapshots to making photographs.
500 Snapshots or 50 Composed Shots: Which Approach Yields Better Holiday Photos?
The digital age has gifted us with nearly infinite storage, but it has also fostered a bad habit: « spray and pray » photography. We take hundreds of photos of the same scene, hoping one will turn out well. This approach not only clutters our devices— research reveals that the typical smartphone user stores an average of 2,795 photos—but it also prevents us from engaging with our subject. The path to better photos lies in a radical shift: shooting less, but with more intention.
Instead of 500 mindless snapshots, aim for 50 thoughtfully composed shots. This requires you to slow down, observe, and pre-visualize the image you want to create before you even raise your phone. Ask yourself: What is the story I’m trying to tell? What is the most important element in this scene? Is there a better angle? This deliberate process is the hallmark of a professional photographer. One powerful method to practice this intentionality is the « Triptych Method. »
The Triptych Method for Intentional Travel Photography
Professional mobile photographers employ a strategic three-shot approach for each significant moment: a wide establishing shot for context, a medium shot focusing on the subject, and a close-up capturing texture or emotion. This method creates a narrative series rather than random snapshots, making the post-processing phase more manageable and creative. The triptych approach forces photographers to slow down and pre-visualize the final image before raising the camera, resulting in higher-quality photos and more intentional storytelling.
Adopting this mindset has a profound effect. You’ll find yourself looking for details you would have otherwise missed: the texture of an ancient stone wall, the way light catches a wisp of steam from a coffee cup, the fleeting expression on a market vendor’s face. Your camera roll will transform from a chaotic dump of repetitive images into a curated gallery of visual stories. Ultimately, a handful of well-composed, meaningful photographs will bring you far more joy and better memories than thousands of forgettable snapshots.
The Filter Overuse That Ruins Otherwise Beautiful Holiday Photos
Once you’ve captured a well-composed, well-lit image, the final step is editing. This is where many aspiring photographers go wrong. Seduced by the one-tap magic of social media filters, they often apply heavy-handed effects that oversaturate colors, crush details in shadows, and give skin tones an unnatural orange glow. This is the digital equivalent of shouting when a whisper would be more effective. While mobile photography statistics show that nearly 43% of people use editing apps, the key is using them with subtlety.
Professional editing is not about transforming a photo into something it isn’t; it’s about enhancing what is already there. The goal is to make the image look more like how you *remembered* the scene. This usually involves small, precise adjustments to brightness, contrast, and color—not slapping on a « Vintage » filter. Ditching the generic filters and learning to use a powerful editing app like Snapseed (free) or Adobe Lightroom Mobile (freemium) is the most significant step-up you can make in your photography journey.
These apps function as a digital darkroom in your pocket, giving you granular control. Instead of a single « Filter » slider, you can independently adjust highlights (to bring back detail in the sky), shadows (to reveal detail in dark areas), vibrance (to boost muted colors without affecting skin tones), and much more. The table below, inspired by an analysis of the best photo apps, breaks down some top choices for moving beyond basic filters.
| App | Best For | Key Editing Strength | Pricing Model | RAW Support |
|---|---|---|---|---|
| Adobe Lightroom Mobile | Professional photographers | Selective adjustments and presets for cohesive visual style | Subscription (£11.99/month) | Yes |
| Snapseed | Free comprehensive editing | Vibrance vs saturation smart controls, 29 professional tools | Free | Yes (DNG) |
| VSCO | Film aesthetic filters | Authentic film stock emulations with manual HSL toggles | Free / Plus £29.99/year | Limited |
| Photoshop Express | Quick social media edits | One-tap auto corrections with heal tool for blemishes | Free with in-app purchases | No |
| Luminar App | AI-powered enhancements | AI sky replacement and portrait retouching with presets | Subscription | Yes |
Start small. Open a photo in Snapseed or Lightroom and just play with the « Tune Image » sliders. See what each one does. Your goal should be subtlety. If the editing is obvious, you’ve gone too far. A great edit is one that nobody notices.
When Should You Photograph Popular Landmarks to Avoid 100 People in Your Holiday Photos?
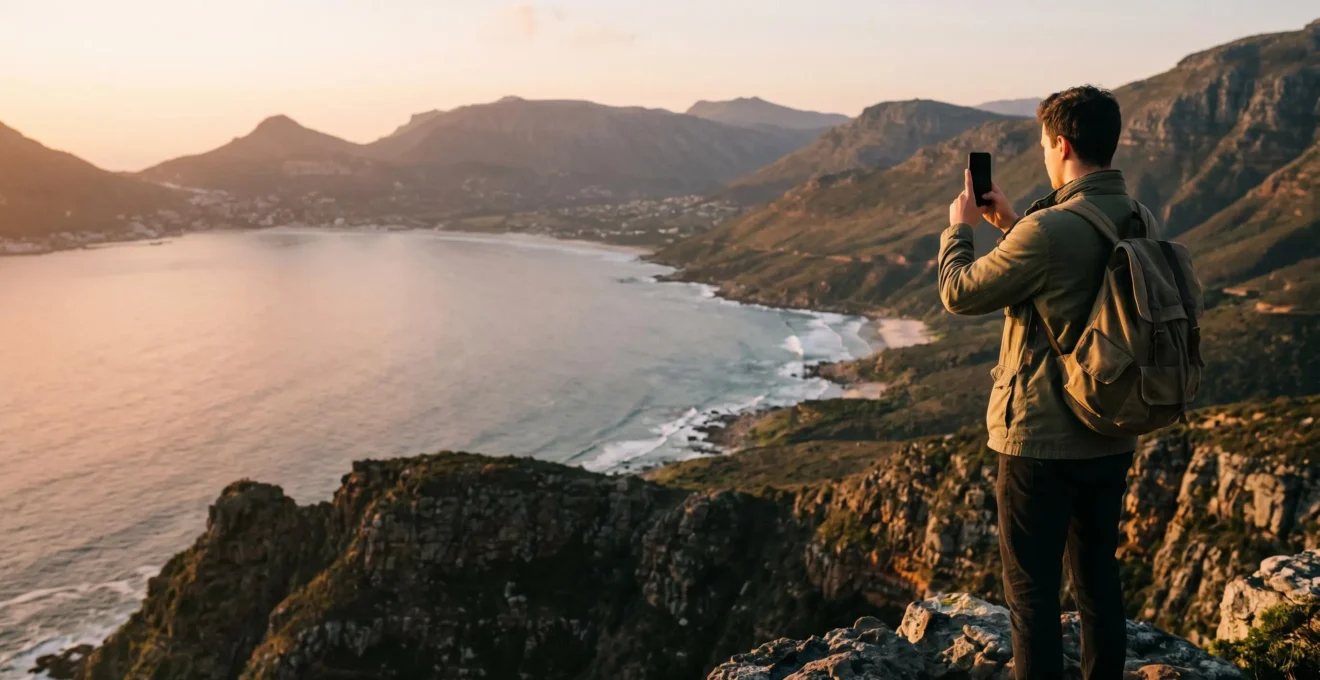
You’ve arrived at the Eiffel Tower or the Colosseum, ready to capture that iconic, postcard-perfect shot, only to find yourself in a swarm of thousands of other tourists. Getting a clean shot seems impossible. The secret to those beautiful, empty-looking landmark photos isn’t a secret location; it’s a combination of timing and technology. The single most effective strategy is to beat the crowds by visiting at the extremes of the day. Early morning, particularly just after sunrise (around 6-8 AM), is often the quietest time, offering beautiful, soft light and minimal human traffic.
But what if a pre-dawn alarm call isn’t part of your holiday plan? Modern technology offers powerful tools for digital scouting and creative workarounds. Your smartphone is not just a camera; it’s a crowd-avoidance machine. Techniques like using long exposure to blur people into artistic streaks or leveraging telephoto zoom to crop them out are game-changers. The key is planning ahead and knowing which tools to use on the spot.
Rather than arriving and hoping for the best, a few minutes of digital scouting can transform your photographic outing. By using freely available tools, you can predict crowd levels, find unique perspectives, and prepare the right camera settings before you even leave your hotel. The following checklist outlines a professional workflow for this process.
Your Action Plan: Digital Scouting for Crowd-Free Landmark Photography
- Check ‘Popular Times’: Use Google Maps’ « Popular Times » feature to identify the quietest hours at your destination landmark (typically early morning 6-8 AM or late evening).
- Real-Time Reconnaissance: Check Instagram’s « Recent » posts for the location tag to get a real-time assessment of crowd levels before you head out.
- Embrace Motion Blur: Enable your phone’s Long Exposure or Live Photo mode. When you hold the phone steady, moving crowds and traffic will blur into beautiful, artistic streaks, making the static landmark stand out.
- Find a New Angle: Scout high vantage points or unusual perspectives using Google Street View beforehand. A view from a nearby bridge, a side street, or an upper-floor window can offer a unique and less crowded shot.
- Compress the Scene: Use your phone’s telephoto zoom (3x or 5x optical). Standing further back and zooming in compresses the scene, making the landmark appear dominant while allowing you to crop out crowds in the foreground.
By combining strategic timing with these digital techniques, you can dramatically increase your chances of capturing that clean, compelling shot of an iconic landmark, turning a frustrating experience into a creative opportunity.
Golden Hour Crowds or Midday Solitude: When Should You Photograph Extraordinary Landscapes?
Every photography blog will tell you to shoot during the « golden hour »—the period shortly after sunrise or before sunset when the light is soft, warm, and magical. This is excellent advice. The problem is, every other photographer knows it too. At popular landscape spots, the golden hour can be more crowded than midday, defeating the purpose of seeking solitude. While the golden hour provides beautiful, easy-to-work-with light, limiting yourself to it means missing a world of creative opportunities that other times—and other weather conditions—present.
Midday sun, often dismissed as « bad light » due to its harshness and strong overhead shadows, can be used to create dramatic, high-contrast black and white images. The stark shadows can emphasize textures and create powerful geometric patterns that are lost in soft light. Similarly, what most tourists would call a « ruined » day—overcast, foggy, or rainy—is often a gift for a photographer. These conditions present unique moods and atmospheres that are impossible to capture on a perfectly sunny day.
A professional travel photographer doesn’t see bad weather; they see creative opportunities. An overcast sky diffuses the sun, creating a massive, flattering soft light source that is perfect for portraits. Rain-slicked streets create vibrant, moody reflections, and fog adds an ethereal layer of mystery to a landscape. This perspective is beautifully captured in a piece of advice for mobile photographers:
An overcast sky acts as a giant, free softbox, perfect for portraits without harsh shadows. Rain creates dramatic reflections and moody atmospheres that add mystery to travel photography. What casual photographers dismiss as a ‘ruined’ day actually presents unique photographic opportunities – fog adds ethereal mystery to landscapes, while dramatic storm clouds create compelling black-and-white images with high contrast that emphasize textures impossible to capture in flat midday sun.
– Professional Photographer Advice via Artifact Uprising
The lesson is to be adaptable. Instead of waiting for perfect conditions, learn to see the potential in the conditions you have. Look for reflections on a rainy day, embrace the moodiness of fog, and use harsh midday light to your advantage by seeking out strong shadows and graphic shapes. The most unique and memorable travel photos are often taken when the weather is least « perfect. »
Why Do Iconic Destinations Look Empty in Photos But Packed When You Visit?
It’s the ultimate travel disillusionment: you’ve seen a thousand stunning, solitary photos of a landmark, but when you arrive, it’s a chaotic scene of selfie sticks and tour groups. This discrepancy isn’t just about timing; it’s often the result of a specific photographic technique that professionals use to create an illusion of solitude: telephoto compression. This technique, once the domain of photographers with bulky DSLR lenses, is now accessible to anyone with a modern smartphone featuring a 3x or 5x optical zoom.
The principle is simple. Instead of getting close to the landmark and shooting with a wide lens (which captures the building and all the crowds around it), the photographer moves far away. From this distance, they use the maximum optical zoom to frame the shot. This has two magical effects. First, it dramatically narrows the field of view, allowing the photographer to isolate the landmark and effectively crop out the distracting crowds in the foreground and to the sides. Second, it « compresses » the scene, making the distant landmark appear larger and more dominant in the frame relative to its surroundings.
This technical trick is the primary reason for the gap between the polished images you see online and the reality you experience on the ground. It’s an active process of visual editing done in-camera.
The Telephoto Compression and Patience Technique
Modern smartphones with 3x or 5x optical zoom enable the telephoto compression technique. By standing farther back and using maximum optical zoom, photographers make landmarks appear larger and more isolated in the frame while effectively cropping out crowds positioned closer to the building. This technique is often combined with extreme patience. Professional « empty landmark » shots are frequently the result of waiting up to 45 minutes for a brief, 10-second gap between tour groups to appear. The telephoto lens’s tight field of view means only a small clear space is needed to create the illusion of total emptiness.
So, the next time you see a miraculously empty photo of a famous place, know that it’s likely not a lie, but a carefully constructed truth. It’s a combination of distance, optical zoom, and a great deal of patience, all designed to isolate a perfect moment from the surrounding chaos.
Key takeaways
- Professional results come from intentional choices in composition and light, not expensive gear.
- Mastering your phone’s built-in tools like HDR, grids, and optical zoom is the fastest way to improve your photos.
- Shift your mindset from taking hundreds of snapshots to creating a few, well-composed narrative shots.
How to Enjoy Iconic Destinations When Reality Doesn’t Match Instagram Perfection?
You’ve learned the techniques. You understand telephoto compression, you’ve scouted the quietest times, but you arrive at the landmark and it’s still an overwhelming crowd. Chasing the « perfect, » empty shot can become a source of stress that robs you of the joy of being there. At this point, the most professional move you can make is to change your objective. If you can’t erase the reality of the crowd, embrace it and make it part of your story. The most authentic and often most interesting travel photos are not the sterile, postcard-perfect ones, but those that capture the feeling of a place.
Instead of zooming in to isolate the landmark, zoom out. Tell the story of the place as it is today: a vibrant, living destination enjoyed by people from all over the world. Or, go in the opposite direction. Ignore the grand vista entirely and focus on the small details that make a place unique. This is a chance to create a more personal, sensory photo essay. What does this place feel like? Capture the rough texture of an ancient stone, the intricate pattern on a tile, or the hands of a street vendor preparing a local delicacy. These close-up, abstract shots can evoke the spirit of a location more powerfully than another wide shot of the main attraction.
This approach transforms your photography from a hunt for trophies into a practice of mindfulness. It forces you to look closer and connect with your surroundings on a deeper level. Instead of being frustrated by the crowds, you can photograph the joy on a child’s face as they see the monument for the first time. Instead of waiting for a gap in the tour groups, you can create a compelling image of the river of people flowing through the historic site. By shifting your definition of a « good photo » from technical perfection to authentic storytelling, you not only get more unique images but also enhance your travel experience itself.
Ultimately, the goal is to return from your travels with images that reignite the feelings you had in that moment. By applying these techniques with the powerful camera you already own, you can move beyond disappointment and start creating a collection of holiday photos that you are truly proud to share and cherish.